I went to a workshop from Carol Blackburn this weekend: patterns in polymer clay - and boy, did I have a blast! Not only that, the day after I was sparkling with energy, best spend in making new stuff of course. Enjoy!
|
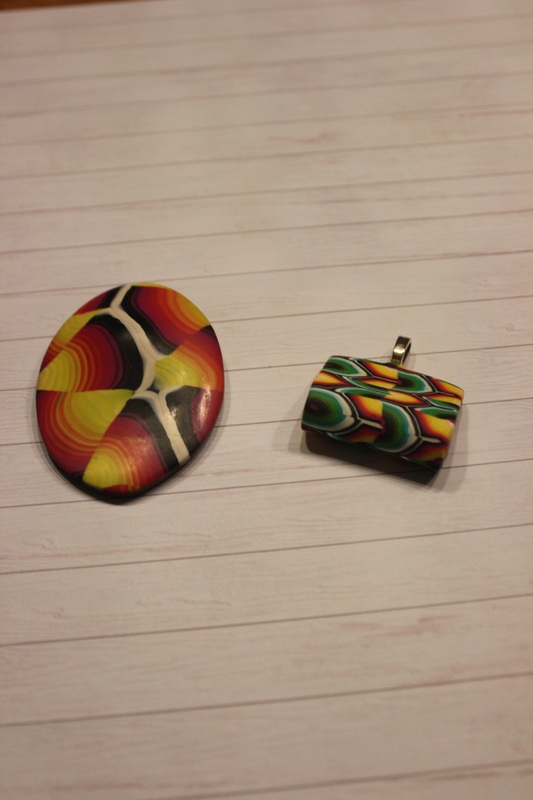
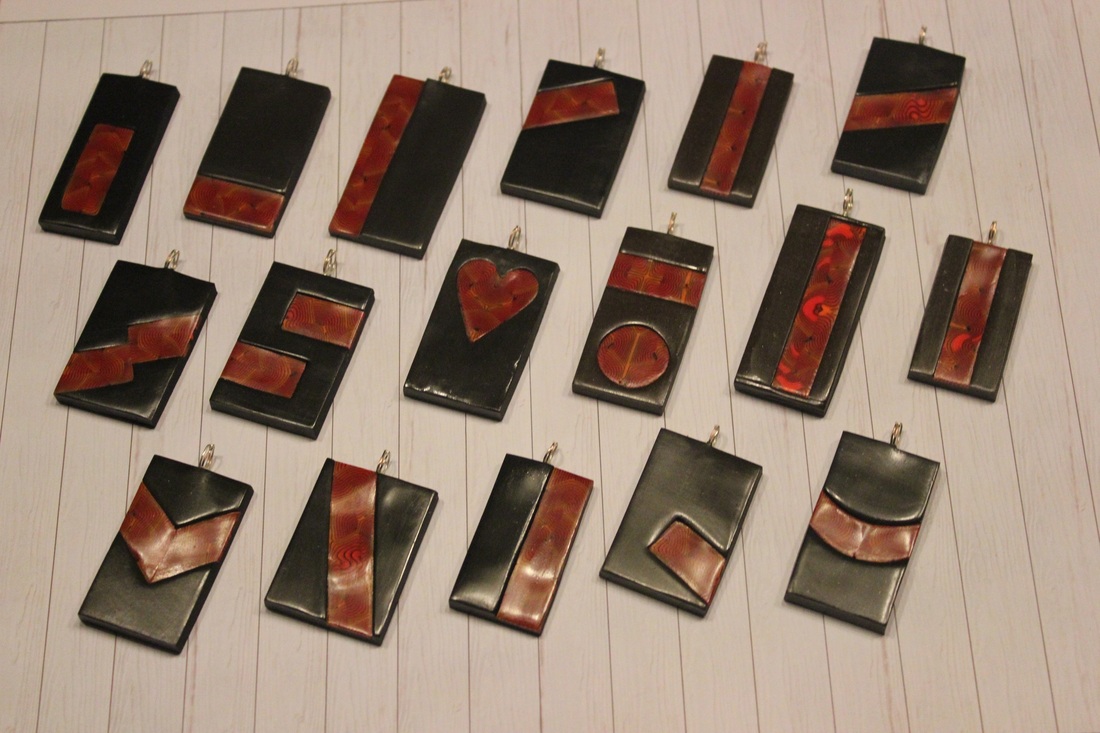
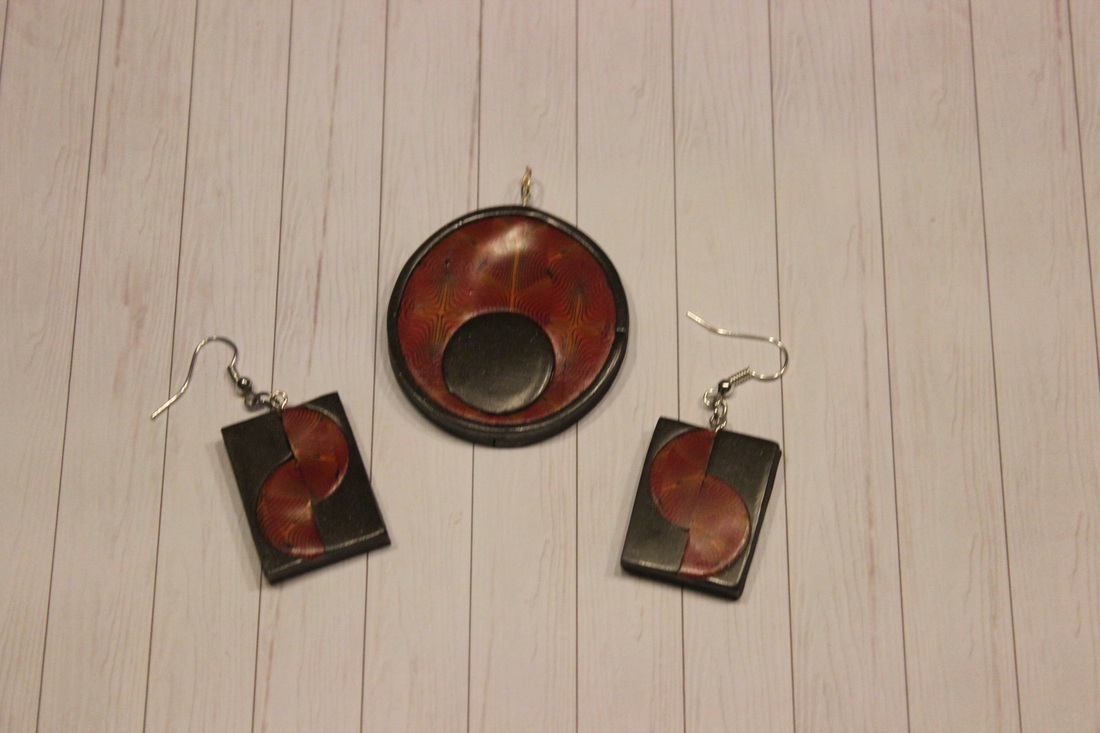
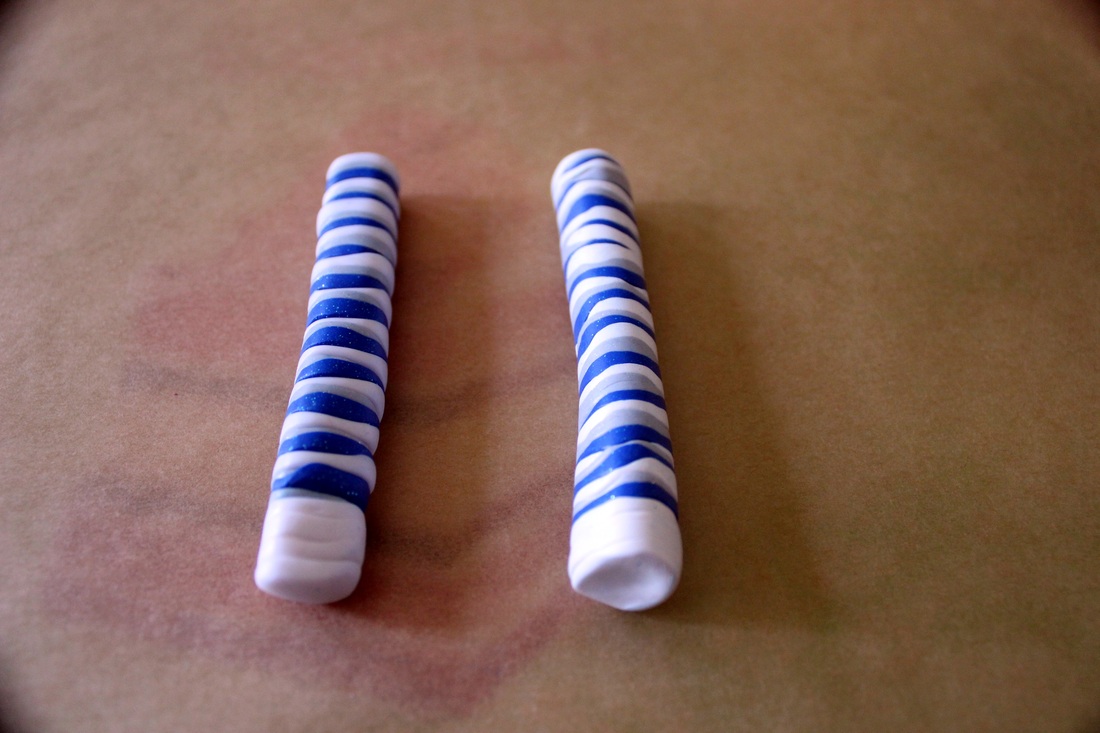
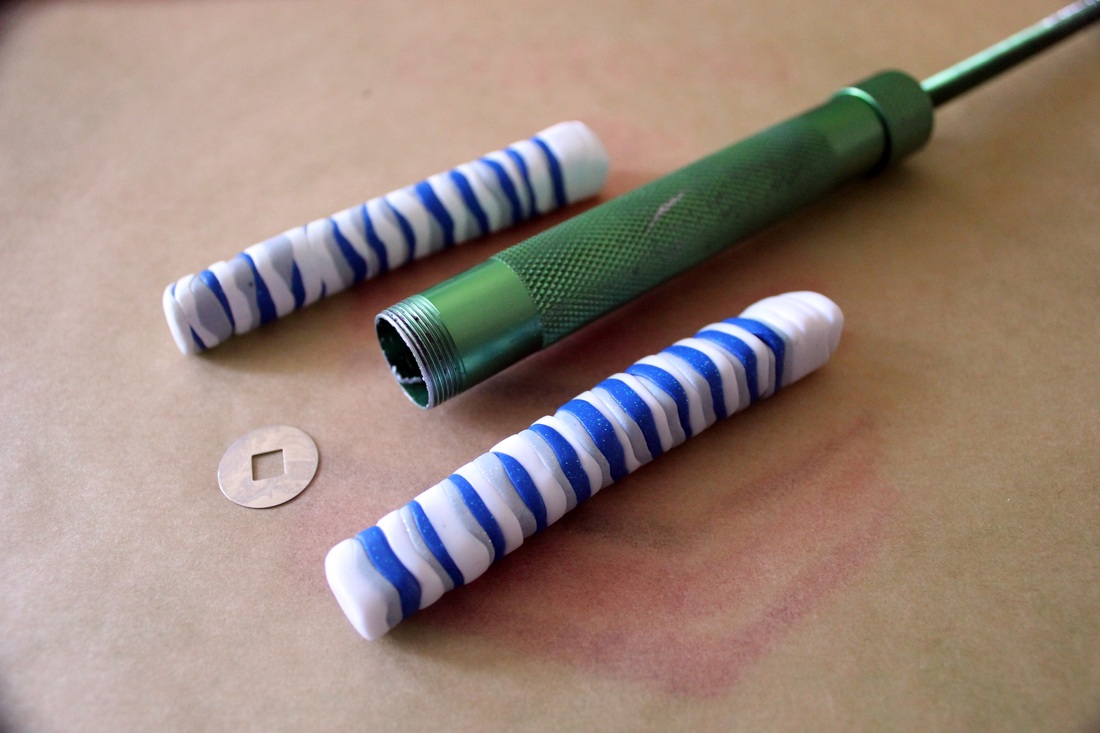
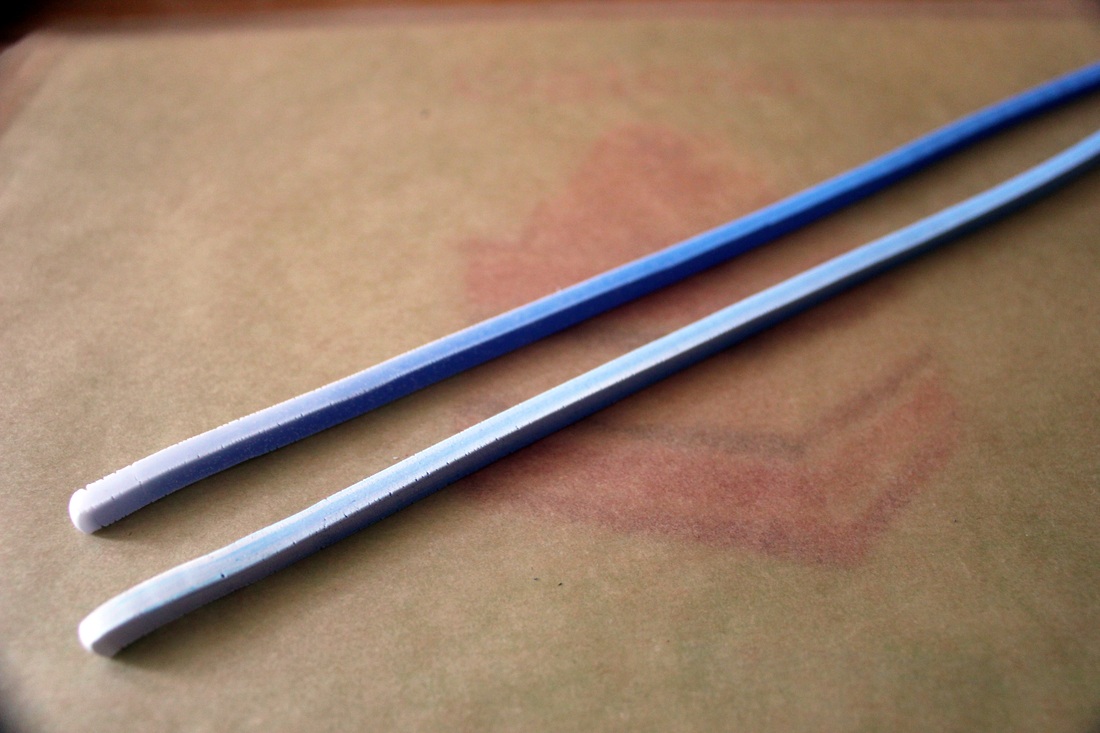
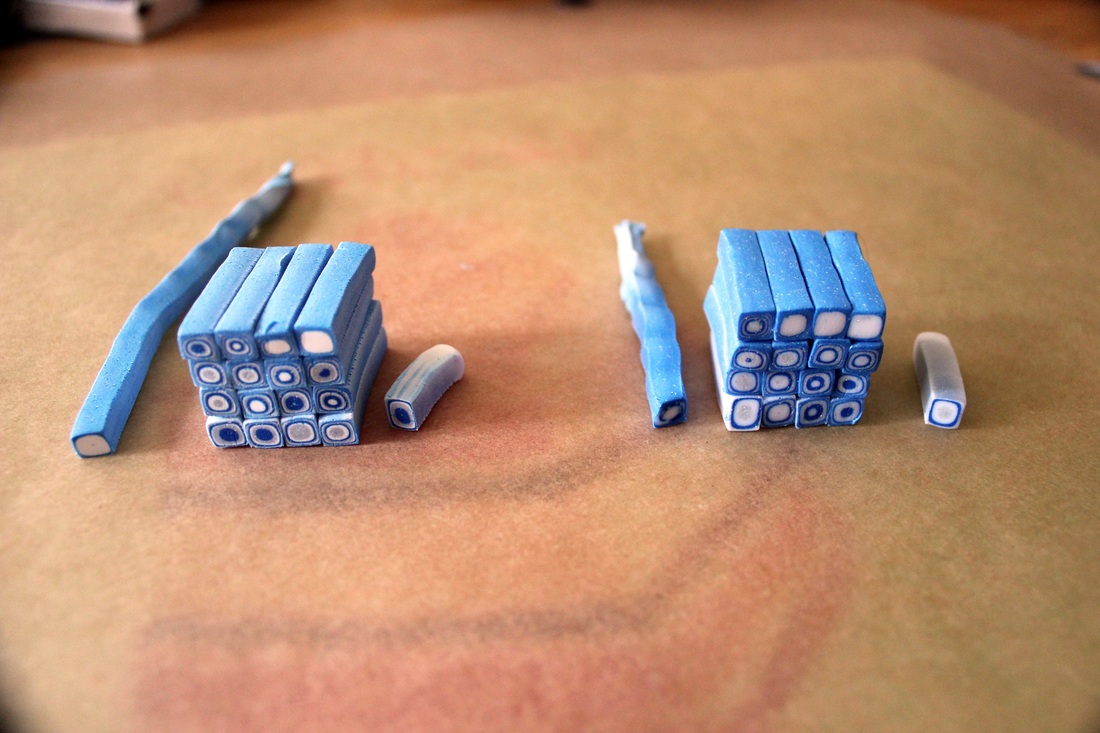
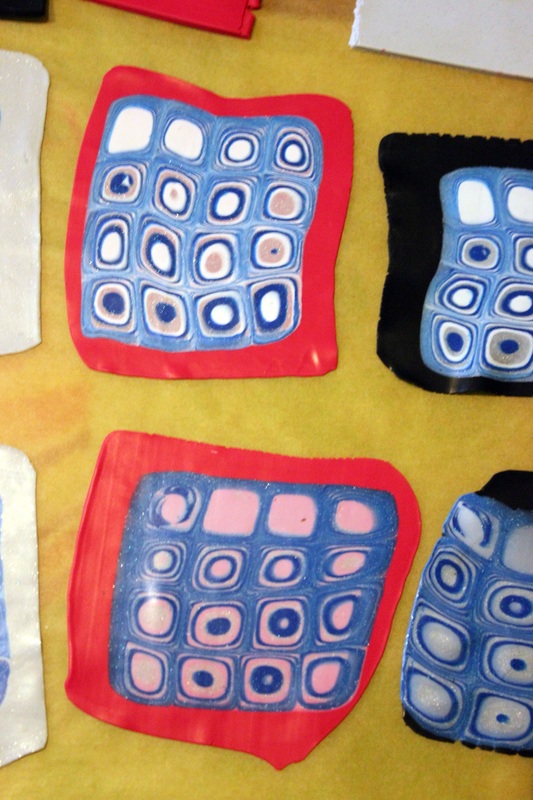
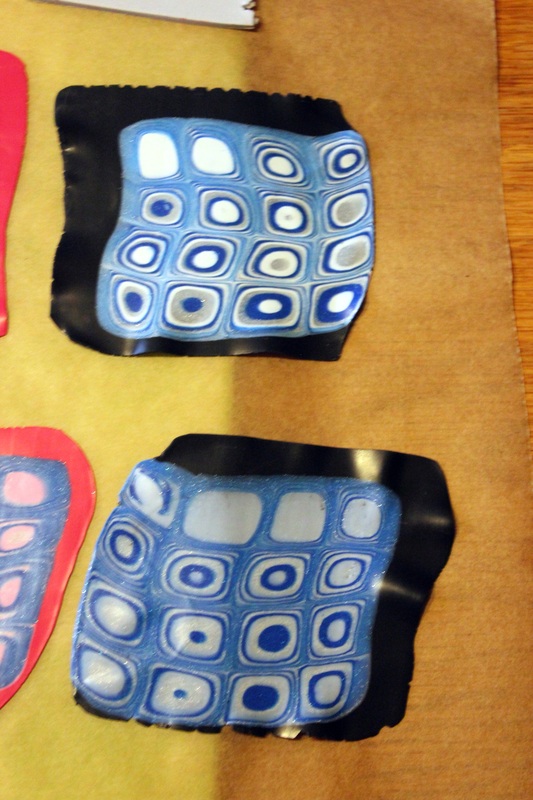
Today I can reveal the real second try at creating Zentangles in clay. I'm quite happy about the result. The tangles were created in raw clay, than backfilled. The third picture is of my experiment with liquid clay and inka metalic paste. Last week I created a Zentangle cane for a challenge on a facebook board. I wasn't that thrilled about it, so this week-end I attacked the subject from another angle. Now, currently I shan't yet show the finished work, since the challenge only opens up for posting from february 1st. You'll have to wait until then. Wat I can show is 'hte fall-out' from this session. A ton of scrap clay begged to be processed. Beside that I finished some left-overs from previous sessions. This is a collection ow work done before, during and right after last/this years festivities. I only came around last weekend in finishing things up. This time around I asked my beloved significant other to choose colors from the box, and she pointed to brown toned clay, so I started out using it.Beside that I finished some other side projects. Finally I got at least some form of Mokugame working. Some sort in the sense that I got the thickness of the top layers in respect to the thickness of the imprint working. But most of all, I managed to get the shaving part more or less correct. I was pleasantly surprised by the colors, I used some pearl-mutter and silver clay and the shine they got was really stunning. Definitely a process to explore further! The blue ones were actually a failed attempt. I tried to imprint on a Mokugame layer a drawing with a dotting tool, but since this now was lower than the mayor part of the clay and probably not deep enough, the shaving didn't work. So I just started scratching the top layer randomly, flattened the scratched-off clay back on the slab and used that. Turned out quite interesting as well, but of course not a geometric as the other pieces. The other pieces was, again, a clean-up action for opened blocks of clay. When putting white borders around last weeks pendants, our daughter suggested to put black borders instead. So I kept half of them until I restocked on black and put black borders around them. For quite some time I was thinking about hollow beads and finally I tried a way to get there. I have mixed feelings about the result though, but the basic way of getting there is sound. Ah, and abalone sheets, well they were at an unexpected discount so I bought quite some packages. Fun part at that point is that there's less reluctance to work with them. If I screw up, I loose less money ;-). Enjoy! I went to the crafts fair and saw Inka Gold paste, had to buy them, had to try them ;-) Finally I found the time to finish the pendants I made at the beginning of my summer holiday. There's a multitude of pendants I made from a cane (not all duplicates are shown) in different shapes and some based on micro beads that took an awe-full time to make. Open clay packages tend to be too many all the time? And somehow, for every two packages I finish another one just needs to be opened. Well I guess at some point I'm manage to get them all. After dabbling a lot with different colors and making canes, inevitably there's quite a few packages of clay that are open but not empty and I collected some left overs of canes. So last week and this week-end it became time to use the left overs to create new stuff. Besides that I created my first bangles and ear rings. When you look around you in a different way, you often see art in disguise. Not only for paintings but now it seems also for working with clay. I find it interesting as well how, in a way, I let the materials guide me they sit there in front of me, a heap of stuff, colors, shapes, textures and quite often an idea forms, fingers start tweaking.... My sister-in-law asked me whether I could make her something in green. Well, why not. While I was doing so I discovered a new technique and so I used op some cane slices to test it with other colors. My oven broke down and I had to wait for a new one to be installed. So it took a while for some new stuff. Enjoy. The first one was featured before, but this time I finished it with a necklace. This weekend I had a bit of a frenzy. It started Friday evening, not stopped till now, Sunday evening. In the mean-time I also had a small clay day with my mother and sis, showing and teaching them some techniques.Fun we had indeed ;-) Been lazy a bit in finishing some jewelry pieces, but finally came around. Nit for all though, I have a set of disks I'd like to turn into a necklace, but I'm still undecided how I should do it. Perhaps I can use them as a decorating piece of a belt. Worked out a set of pendants for myself. Cindy Lietz showed on her polymer clay tutor blog how you can color shift a skinner or teardrop blend. It was quite funny since, right about that time, I did a similar thing on cane slices. I mentioned this as a feed-back on her blog, and she asked me whether I had used translucent clay. Another reader of the blog asked what colors I had used. I did remember that, on the examples I showed, I had used translucent white clay, but in other work I noticed this effect on regular clay as well. Hence I decided to demo the effect and put this in my blog. First things first: The cane Of course I need a cane to demo this, and I decided to make two canes, with the same colors, but one with regular white, the other with translucent white. The colors I used: Fimo Effect 014, translucent white, Fimo Effect 203 glitter blue, Fimo Effect 812 glitter Silver and the fimo soft 0 white. 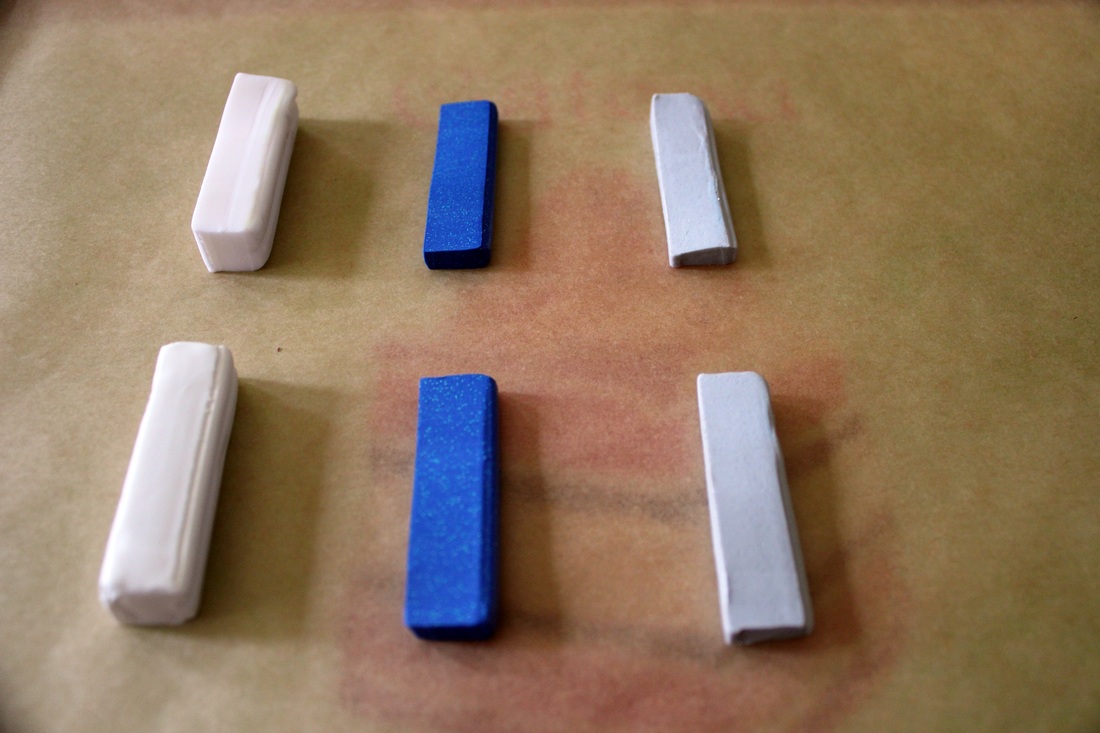
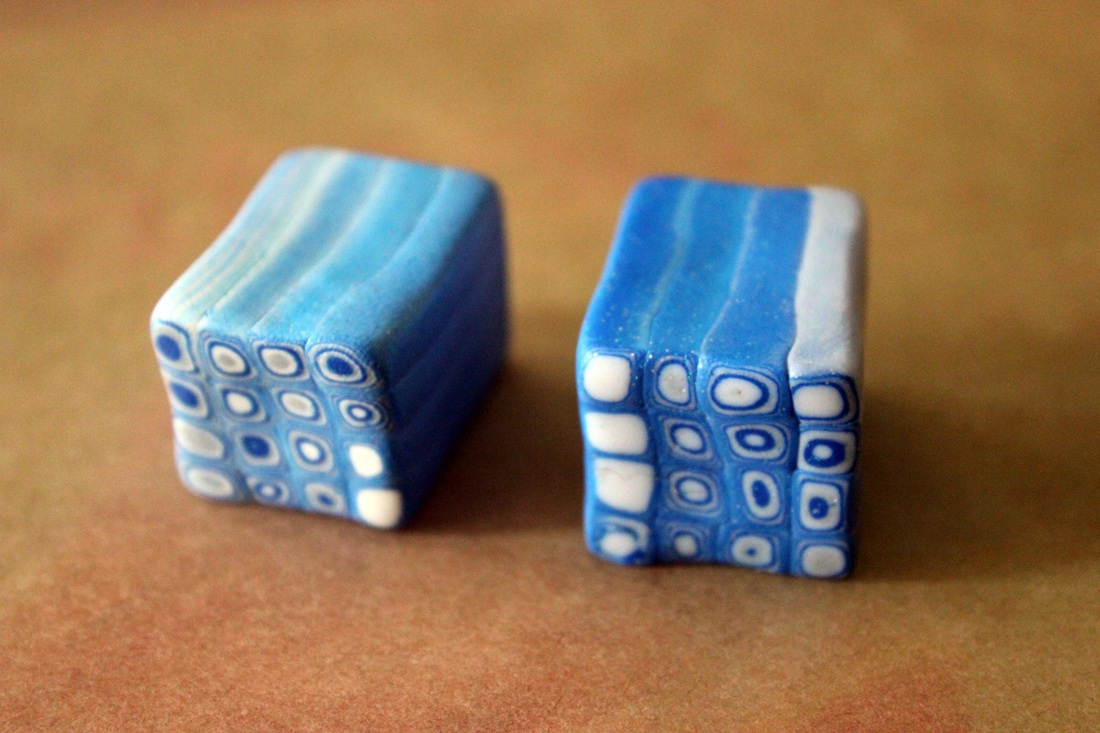
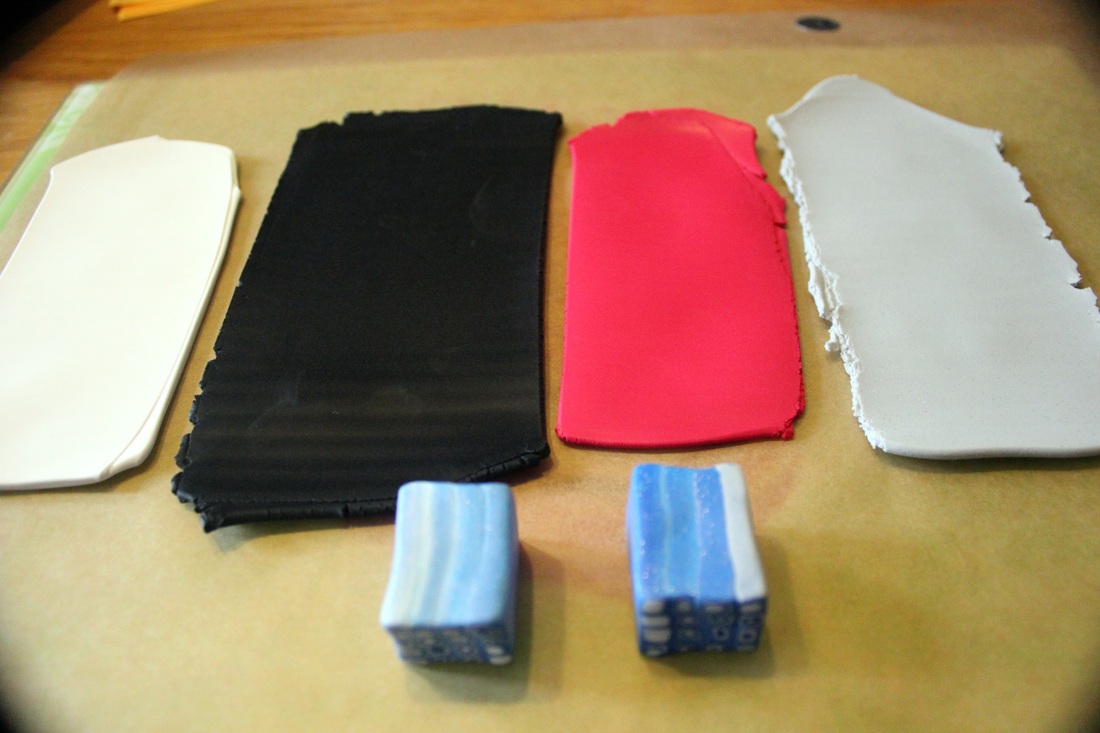
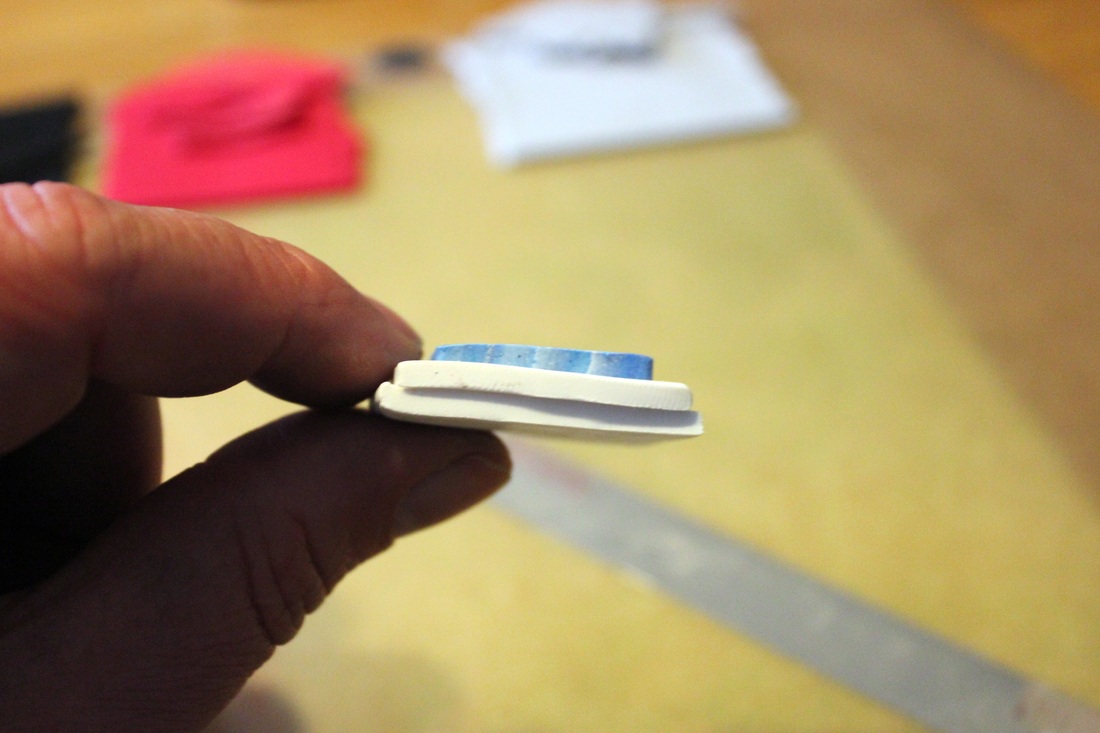
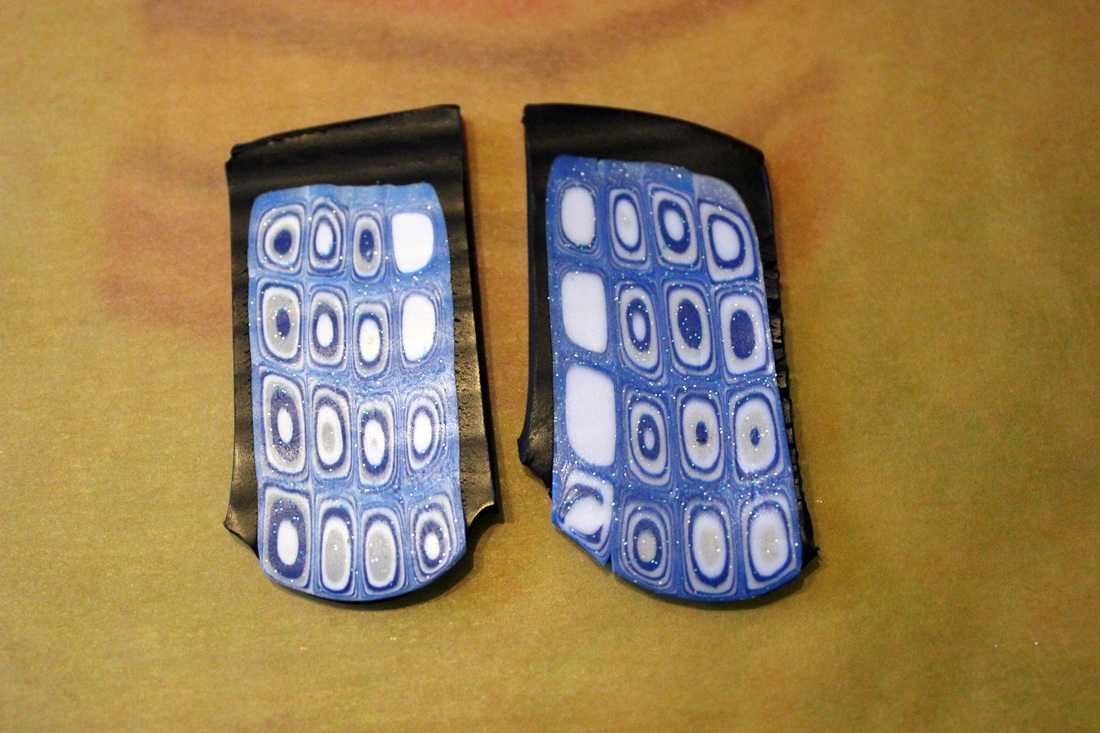
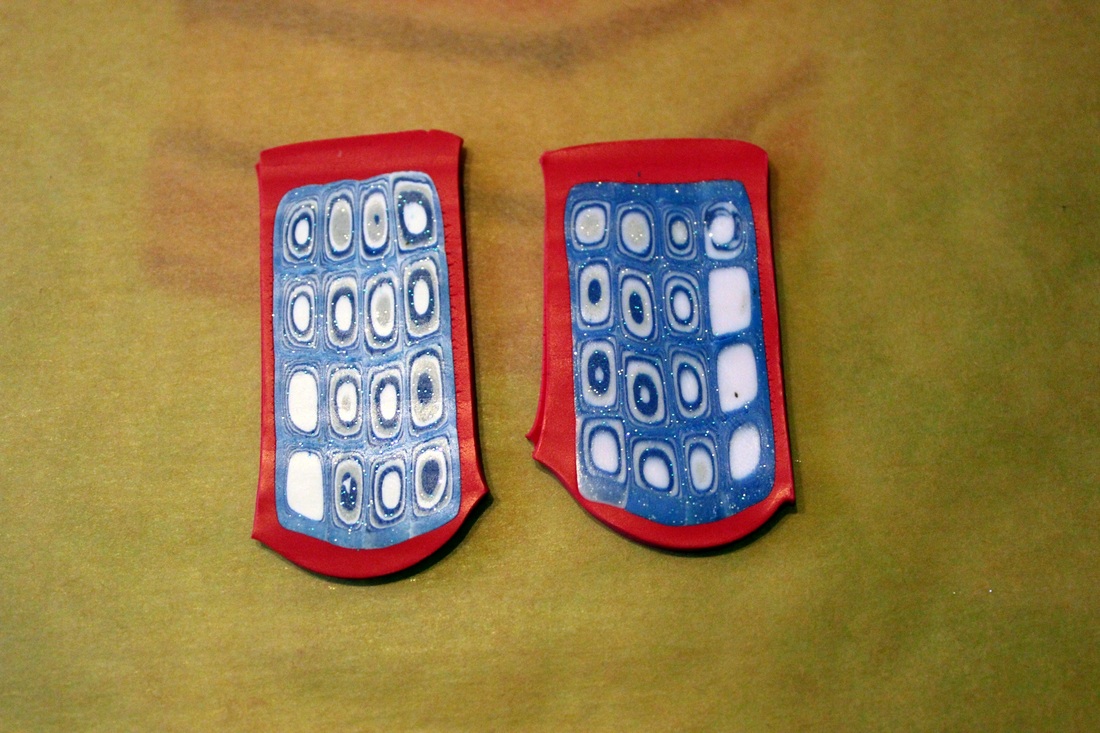
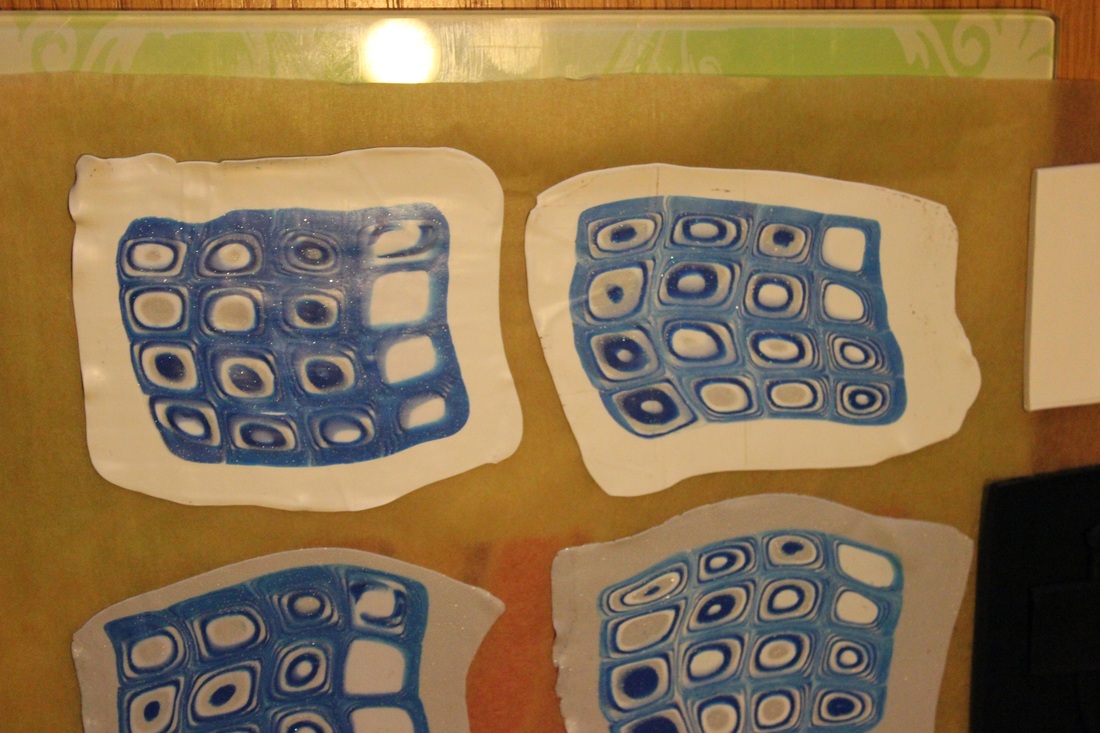
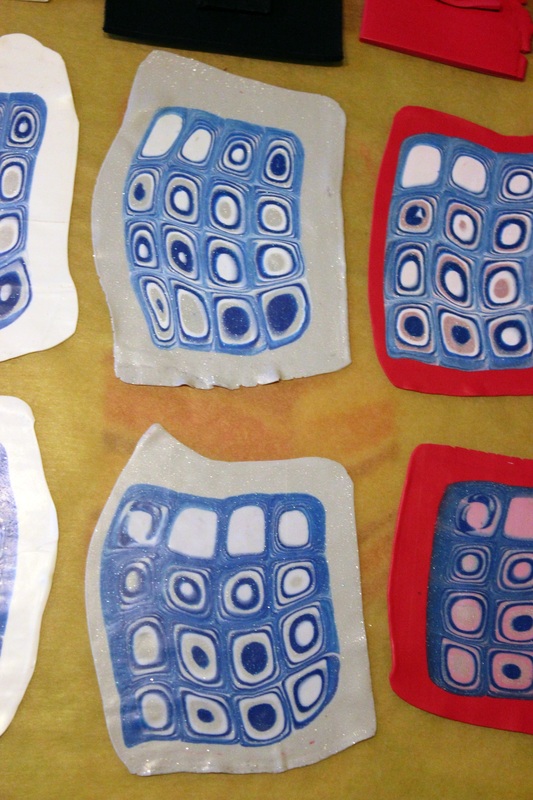
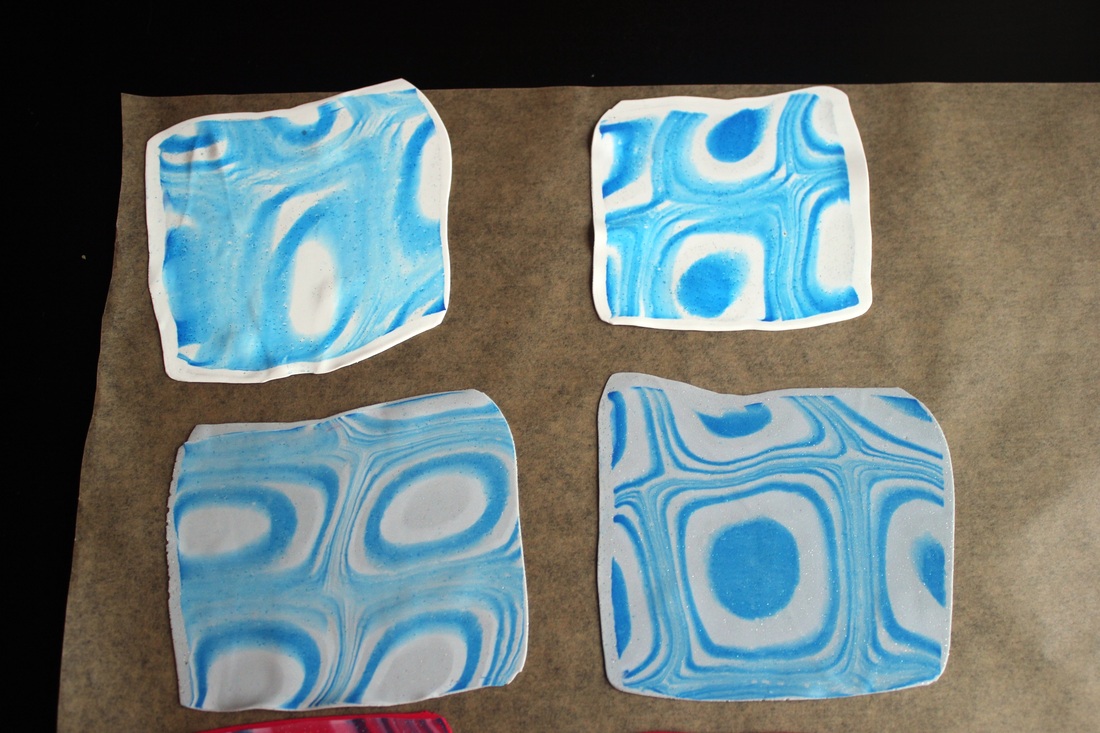
Next up is the 'classic' extruder cane building. One thing you can already notice here is that the right cane has a more vibrant blue. This is the cane made with translucent white. Looks like the translucent white doesn't tone down the blue as much as regular white. Setting up the shifts As backing colors for the shifts I used Fimo soft, 0 white, Fimo classic 9 Black, Fimo soft 26 Cherry red and Fimo Soft 812 glitter silver. The slabs are made using the largest setting (1) on my pasta machine. I also show in the last picture that I use 2 layers of the backing color for a slice and that the slices are about as thick as one layer of the backing clay. First, I run all these through the pasta machine on the largest setting. It'll reduce the size from about 3 to 1. There's not much yet to see at this stage. The translucent versions are shown at the right in each picture. The only thing to notice is that the black version is missing a 'border', this is because the black clay was the stiffest of all and didn't let the slice 'melt' as well into it like the other colors. Now I reduce the thickness, step by step from 1 to 9. At this stage you have a choice. You can either reduce the size by always running it through the machine the same way, this will distort the design drastically, which is very nice in its own right. I opted here to rotate 90 degrees and keep the design as square as possible. Of course, do not fold the clay as in the skinner blend color shift, since we don't want to actually mix and blend the backing color. The idea is to make the slice of the cane so thin relative to the backing color that it will bleed through the top layer. You'll see that the translucent white is letting the backing color through, But, the same effect (most noticeably with the red and black) is also happening with the glitter silver parts of the design. I didn't stop at this stage. I made new backing slabs, and mounted cut-outs from the first run on them. The following picture better shows the differences after the first run. The translucent versions are on the right and when you look at the third down in the left column, you see the red bleeding trough the silver. 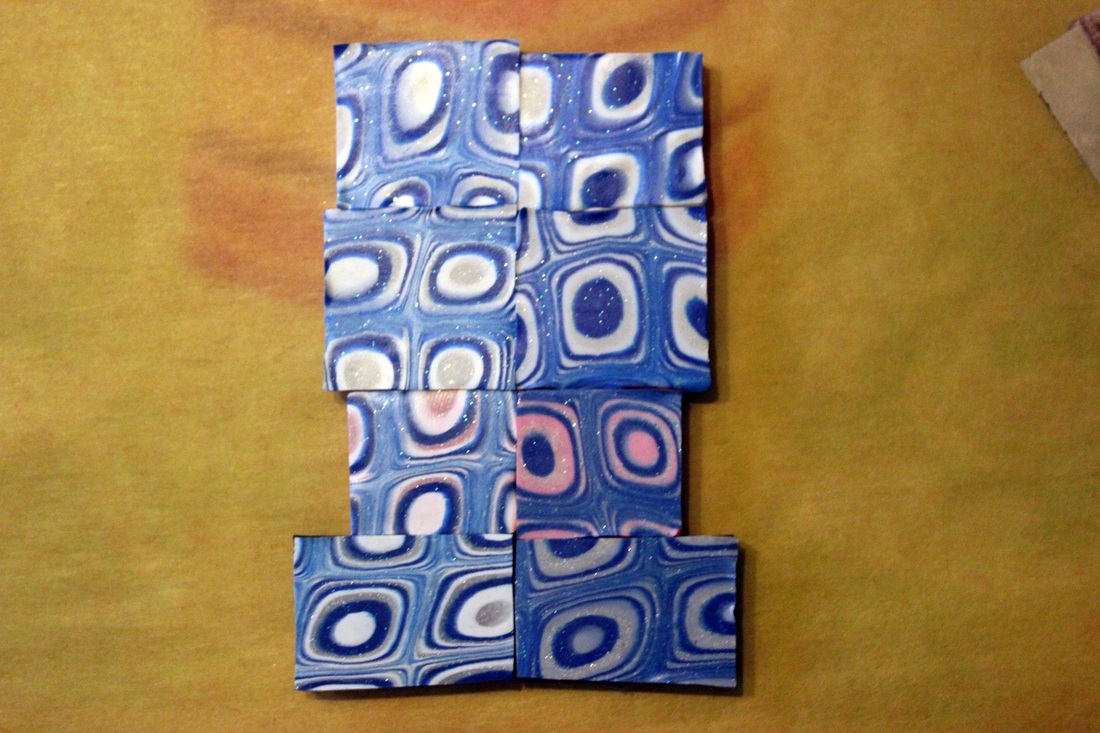
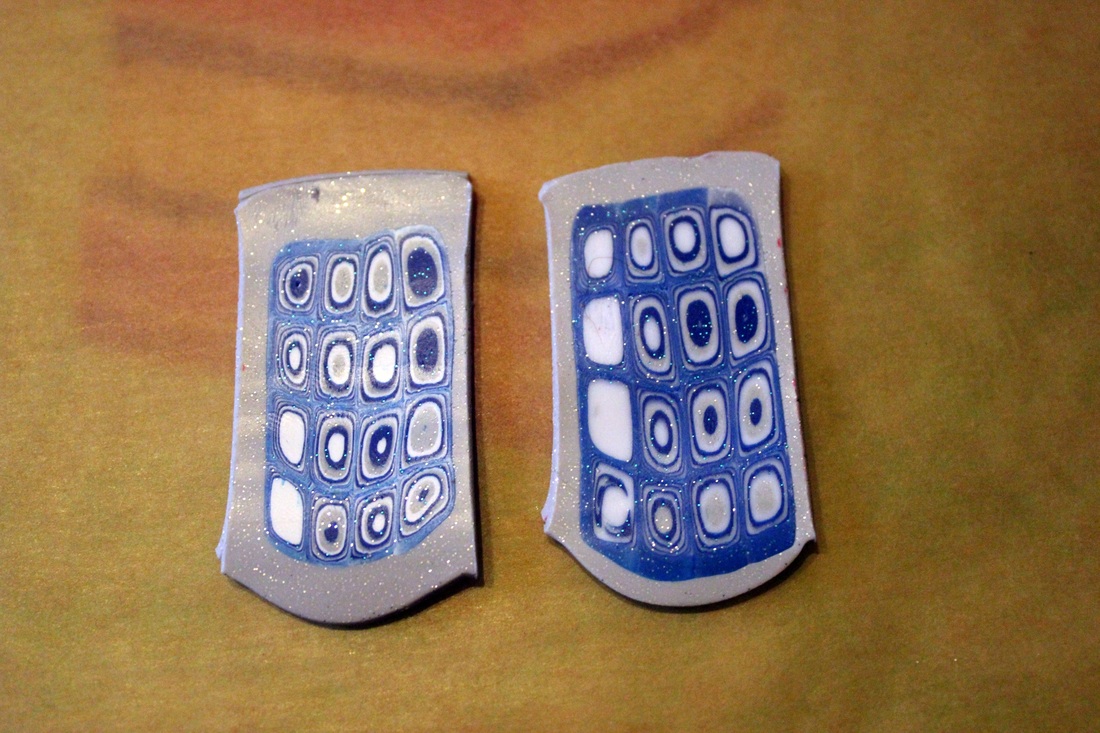
Again, I reduced them first on the biggest setting. Order: black, Red, Silver, White, Translucent white on the bottom row. See how the regular white is still keeping up, but the silver is acting as if translucent. (This nicely shows on the regular white top row) 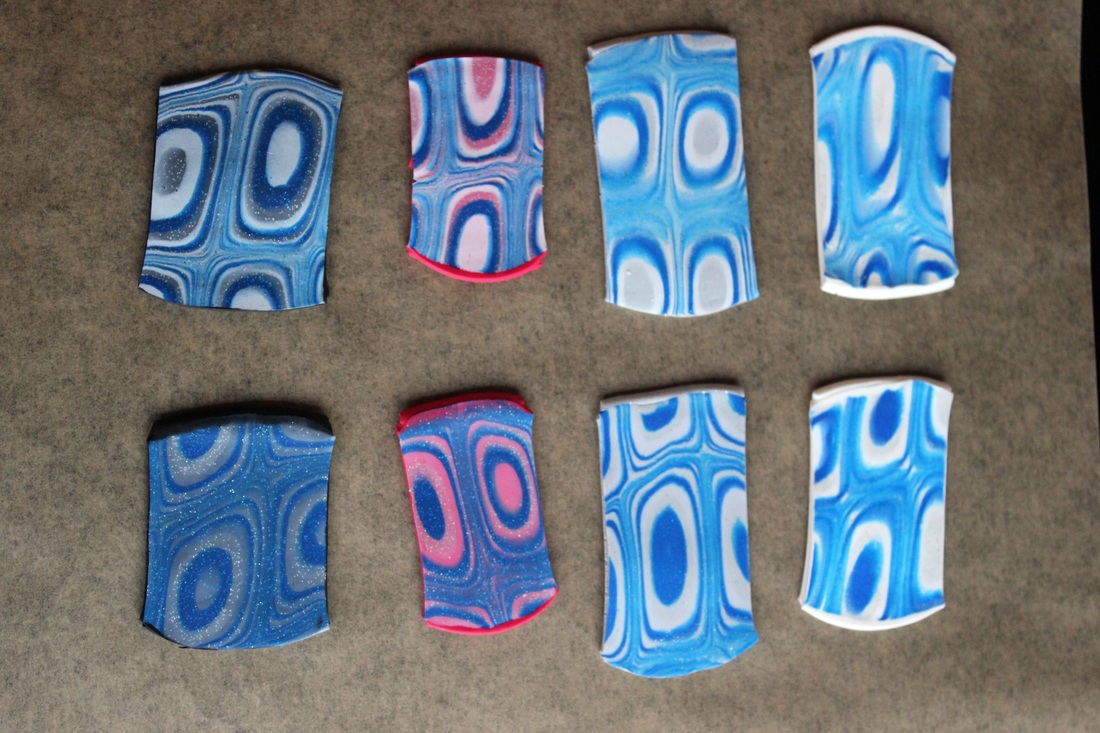
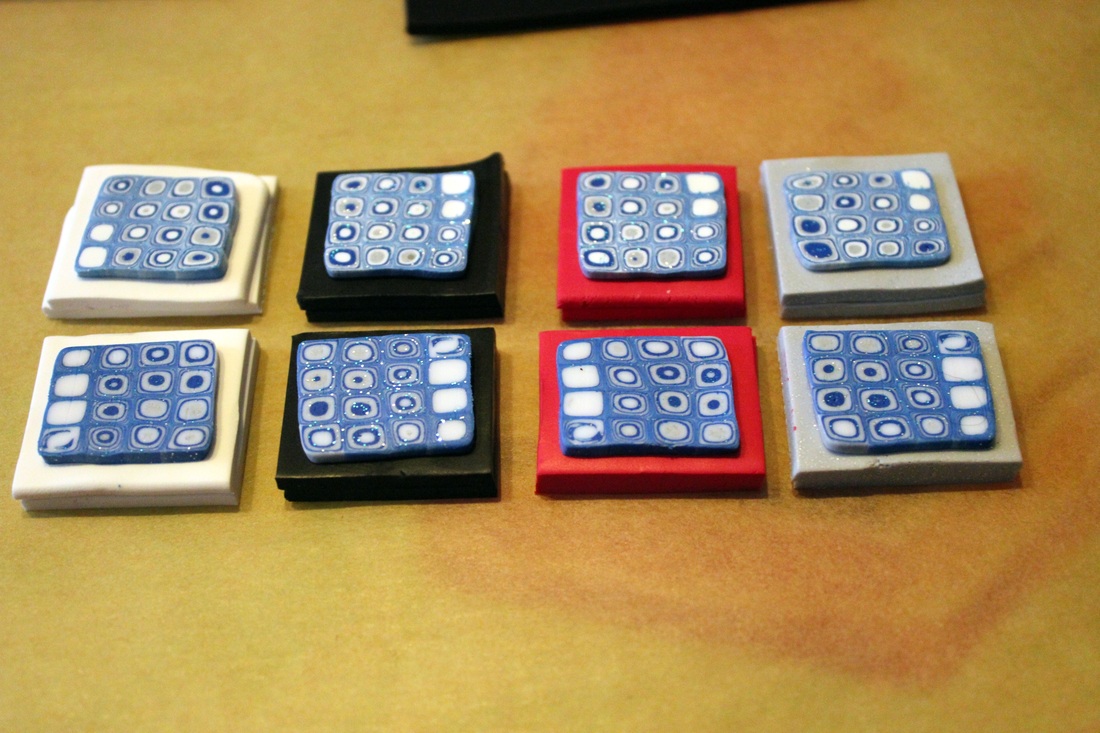
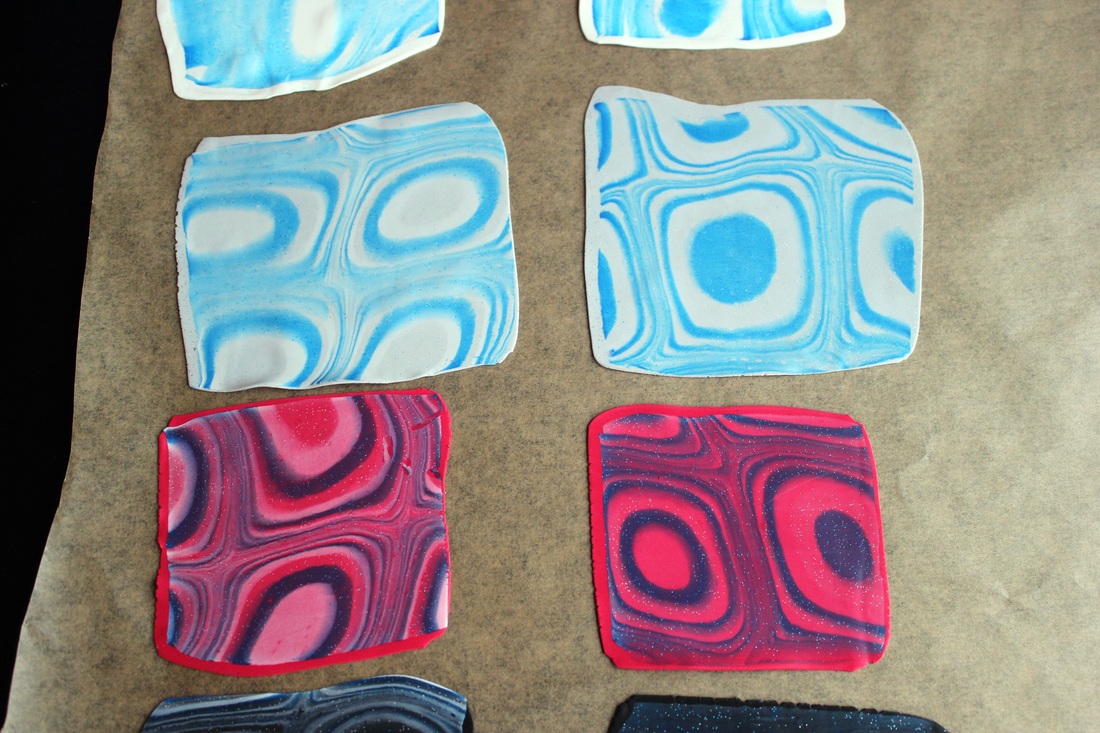
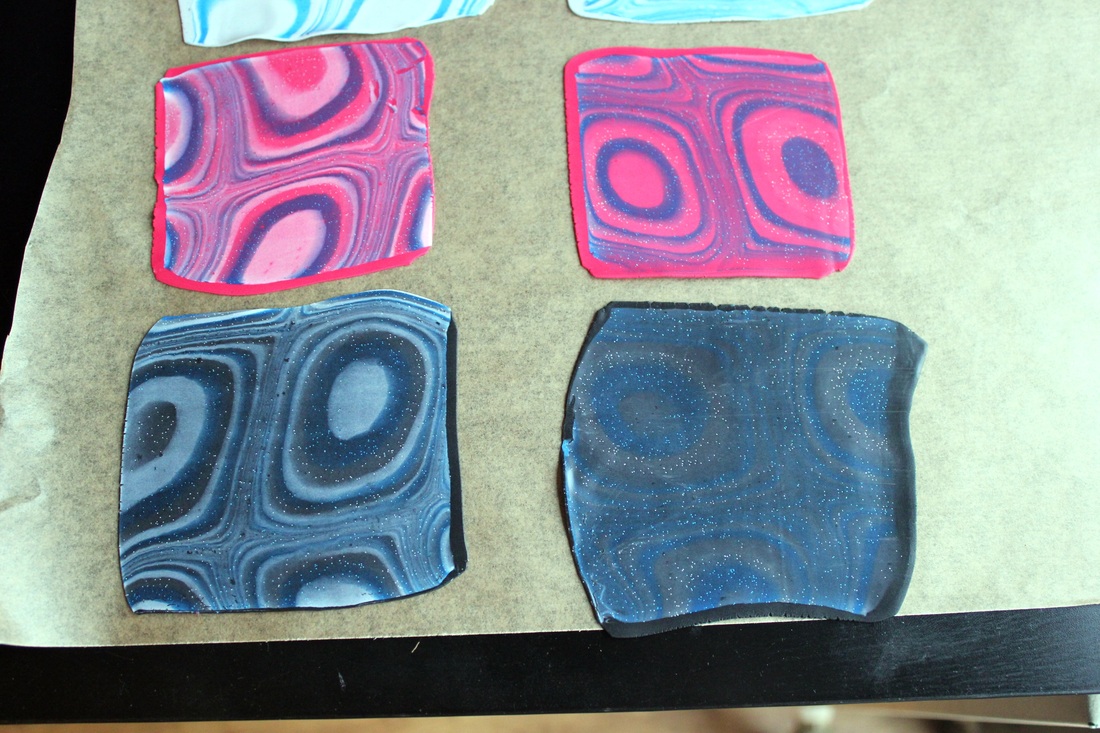
Last step: reducing them to nr 8 on my pasta machine (9 is thinnest) The white backing, makes everything pastel.
The gray is a bit dull, as expected. The red is interesting, but not wow. The non translucent version on the left is a bit more interesting. The black looks best. Choosing the right colors is tricky, and you should be willing to create some scrap clay. In the end I only used the translucent black version. But then again, I choose colors that would hopefully demonstrate the effect in a good way.. If you like this idea, I'm quite curious what you do with it, so leave me a comment if you do. My website here is quite new, so I'm still figuring out the right way to handle comments and stuff, so don't be annoyed if I don't react, could be I can't figure out the right way to do so. Happy claying! It was a lazy afternoon, the weather wasn't all-out sunny, so I lounged in front of the TV. Rented a horror flick, problem was: it was really chilly inside, donned a sweater, and huddled under a blanket, still felt cold. On top of that, the movie, pardon my french, sucked. So feeling a bit dreary, I set up my polymer clay stuff on the outside garden table and things turned out for the better. I heated up from the sun and tried out some Mokume Gane techniques. Not that that turned out well (again), I keep making my layers too thin/too thick, but again it at least turned out some nice result. My dearest asked me to make some jewelry with white ans Silver. So hubby did just that. I couldn't help myself and smuggled some blue into it. Tested a new technique as well. First try was a disaster, so I had to tweak it a bit, which led to some interesting results ;-) |
'Esger'
|

 RSS Feed
